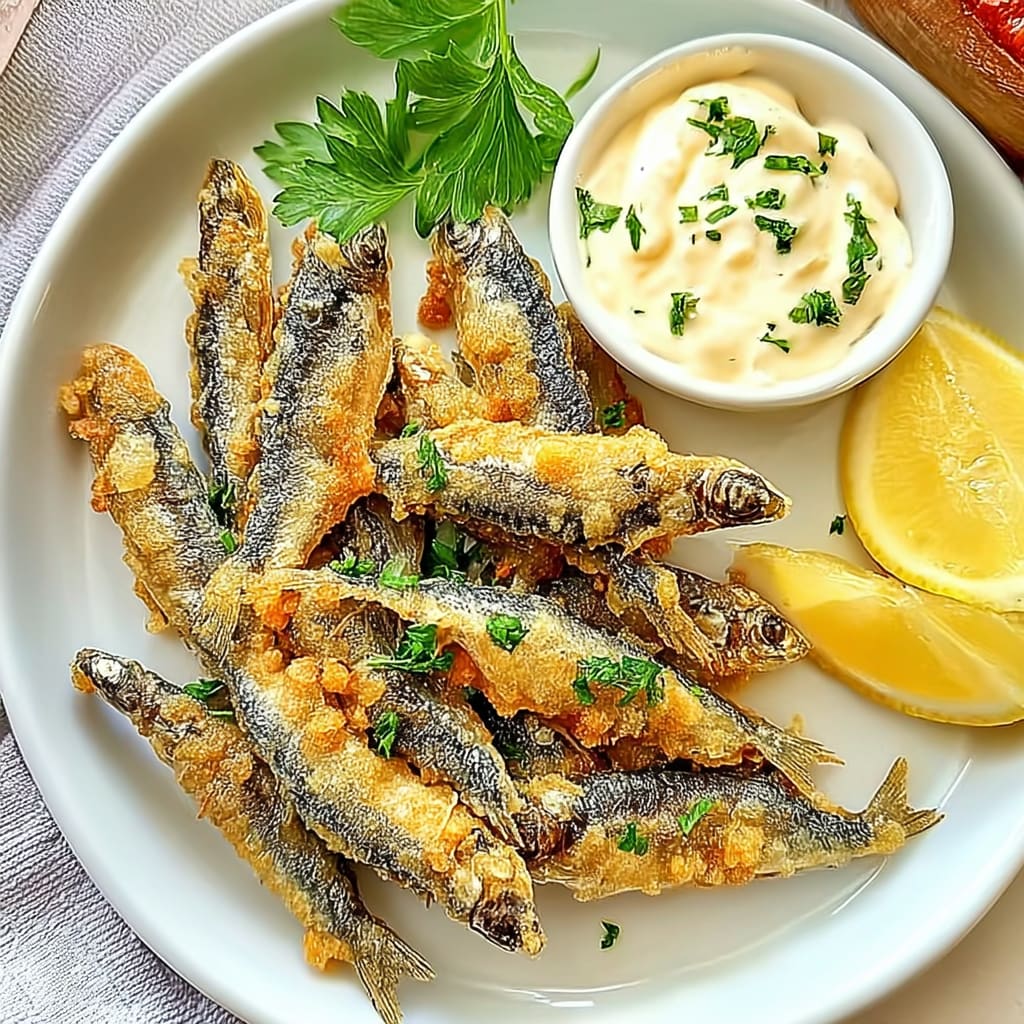
Imagine sinking your teeth into crispy Spanish-style fried sardines, where the golden-brown exterior gives way to tender, flaky fish bursting with ocean freshness. The sizzle as they hit the hot oil is music to the ears, while the aroma wafts through the air, making your taste buds dance in anticipation of that first bite.
These delightful little morsels hold a special place in my heart, reminding me of sunny afternoons spent at bustling tapas bars with friends, laughter echoing around us. Perfect for sharing at gatherings or simply enjoying as a quick snack, these crispy sardines promise an unforgettable flavor experience that will transport you straight to the vibrant streets of Spain.
Why Is Crispy Spanish-Style Fried Sardines for a Quick Tapas Treat So Irresistibly Good?
Quick and easy to prepare, this recipe takes just 15 minutes of prep and 10 minutes of cooking time, making it perfect for busy weeknights. Flavor-packed, the crispy batter holds in the rich, savory taste of fresh sardines, ensuring every bite is a delight. Crowd-pleaser at gatherings, these tapas are sure to impress your guests or family. Versatile enough to be served as a starter or main dish, they pair beautifully with a variety of dips and sides. Plus, healthy sardines are loaded with omega-3 fatty acids, making this treat not only indulgent but nutritious too!
Ingredients for Crispy Spanish-Style Fried Sardines for a Quick Tapas Treat
- For the Sardines
- 500 grams fresh sardines (cleaned and scaled) – These small fish are packed with flavor and make a delightful, authentic tapas choice.
- For the Batter
- 100 grams all-purpose flour – This will create a crispy coating that adds texture to the sardines.
- 1 cup cold water – Using cold water helps to keep the batter light and crisp during frying.
- 1 teaspoon salt – Enhances the flavor of the batter and balances the richness of the sardines.
- For the Oil
- 500 ml vegetable oil (for frying) – Choose a high smoke point oil for perfect frying results.
Step-by-Step Crispy Spanish-Style Fried Sardines for a Quick Tapas Treat
1. Mix the Batter: In a bowl, combine 100 grams of all-purpose flour, 1 teaspoon of salt, and 1 cup of cold water. Whisk until smooth—this batter will give your sardines that delightful crunch!
2. Heat the Oil: Pour 500 ml of vegetable oil into a frying pan and heat it over medium-high heat. The oil should shimmer when it’s hot enough; this is crucial for achieving that golden, crispy texture.
3. Coat the Sardines: Take your 500 grams of fresh sardines (cleaned and scaled) and dip each one into the batter, ensuring they’re fully coated. This step is key to locking in flavor while frying.
4. Fry to Perfection: Carefully place the battered sardines in the hot oil. Fry each side for about 3-4 minutes until they turn a beautiful golden brown and are irresistibly crispy.
5. Drain Excess Oil: Once cooked, remove the sardines using a slotted spoon and let them drain on paper towels. This helps keep them crunchy without excess grease.
Optional: Serve with lemon wedges for a zesty finish!
Exact quantities are listed in the recipe card below.
Expert Tips
- Fresh Sardines: Always choose the freshest sardines available for the best flavor and texture in your crispy Spanish-style fried sardines for a quick tapas treat.
- Cold Batter: Ensure your batter is cold; this helps create a light and crispy coating when frying.
- Oil Temperature: Before frying, test the oil temperature with a small drop of batter. It should sizzle immediately; too cool oil will result in soggy sardines.
- Don’t Overcrowd: Fry sardines in small batches to maintain the oil temperature and achieve an even crispiness.
- Drain Properly: After frying, place sardines on paper towels promptly to absorb excess oil, ensuring they remain crispy and not greasy.
How to Store and Freeze Crispy Spanish-Style Fried Sardines for a Quick Tapas Treat
- Room Temperature: Enjoy your crispy sardines fresh for the best flavor. Leftovers should not sit out for more than 2 hours.
- Fridge: Store any leftover crispy Spanish-style fried sardines in an airtight container for up to 3 days. Reheat in an oven to maintain crispiness.
- Freezer: For longer storage, freeze uncooked battered sardines flat on a baking sheet, then transfer them to a freezer bag for up to 1 month.
- Reheating: When ready to enjoy your frozen sardines, cook from frozen in hot oil until golden brown and crispy, about 4–5 minutes.
Crispy Spanish-Style Fried Sardines for a Quick Tapas Treat Variations
Feel free to put your own spin on this delightful dish and explore new flavors!
- Gluten-Free: Substitute all-purpose flour with a gluten-free flour blend for a crispy batter. This way, you can enjoy the same satisfying crunch while catering to gluten sensitivities.
- Spicy Kick: Add 1 teaspoon of cayenne pepper or smoked paprika to the batter for an extra layer of flavor. The subtle heat pairs beautifully with the sardines, elevating your tapas experience.
- Herb Infusion: Mix in 1 tablespoon of finely chopped fresh herbs like parsley or cilantro into the batter. This adds a refreshing herbal note that brightens each bite and complements the fish’s richness.
- Zesty Citrus: Squeeze fresh lemon juice over the fried sardines just before serving. The citrusy zing will cut through the richness, enhancing the overall taste and adding a lovely brightness.
- Breadcrumb Crunch: Incorporate panko breadcrumbs into your batter for an even crunchier texture. This twist will give your sardines an irresistible crispiness that’s hard to resist.
- Cheesy Delight: Grate some Parmesan cheese into the flour before mixing with water. The cheese will create a tasty crust that adds depth and a savory finish to your fried sardines.
- Smoky Flavor: Consider using smoked salt instead of regular salt in your batter for a unique twist. This small change infuses each sardine with a delightful smokiness that transports you straight to Spain.
- Asian Fusion: Replace vegetable oil with sesame oil and add sesame seeds to the batter for an Asian-inspired touch. This variation offers a nutty flavor and delightful crunch that will surprise your taste buds.
Make Ahead Options
Preparing Crispy Spanish-Style Fried Sardines for a Quick Tapas Treat is a breeze, making it an excellent choice for meal prep enthusiasts. You can clean and scale your 500 grams of fresh sardines up to 24 hours in advance, ensuring they’re ready to go. Additionally, the batter—made from 100 grams of all-purpose flour, 1 teaspoon of salt, and 1 cup of cold water—can be mixed and stored in the refrigerator for up to 3 days. When you’re ready to serve, simply heat up 500 ml of vegetable oil in a frying pan over medium-high heat, dip the sardines in your prepped batter, and fry them for about 3-4 minutes on each side until they achieve that golden-brown crispiness. This way, you’ll save time without sacrificing flavor, allowing you to enjoy these delightful tapas with family or friends!
Crispy Spanish-Style Fried Sardines for a Quick Tapas Treat Recipe FAQs
What type of sardines are best for this recipe?
Fresh sardines are ideal for this recipe, as they have a delicate flavor and firm texture that holds up well during frying. Look for sardines that are bright and shiny, with no unpleasant odor. If fresh sardines are unavailable, you can use frozen ones; just be sure to thaw them completely and pat them dry before battering.
Can I use a different type of flour in the batter?
Absolutely! While all-purpose flour gives a nice crispness, you could substitute it with rice flour or chickpea flour for an interesting twist. Rice flour will add extra crunch, while chickpea flour brings a nutty flavor. Just keep the same measurements—100 grams should work perfectly.
How do I store leftover fried sardines?
If you have any leftovers (though they’re so delicious you might not!), store them in an airtight container in the fridge for up to 2 days. To keep them crispy, reheat them in the oven at 180°C (350°F) for about 5-7 minutes before serving again. This way, you’ll regain some of that delightful crunch.
Can I freeze fried sardines?
Yes, you can freeze fried sardines! Allow them to cool completely after frying, then place them in a single layer on a baking sheet to freeze individually before transferring them to an airtight freezer bag. They can be frozen for up to 3 months. When you’re ready to enjoy, reheat directly from the freezer in the oven at 200°C (400°F) until heated through—about 10-12 minutes.
What should I serve with crispy fried sardines?
These crispy delights shine on their own, but pairing them with a zesty garlic aioli or a squeeze of fresh lemon juice elevates the experience! A side of marinated olives or roasted red peppers complements their flavors beautifully and gives you that authentic tapas spread.
I’m having trouble getting my batter right; any tips?
If your batter is too thick, gradually add more cold water until it reaches a thinner consistency—it should coat the back of a spoon lightly but still drip off easily. Conversely, if it’s too watery, sprinkle in some extra flour until you achieve that perfect balance. Aim for about 15 minutes total prep time to ensure your batter is ready while your oil heats up properly over medium-high heat!

Crispy Spanish-Style Fried Sardines
Ingredients
Method
- In a bowl, mix the flour, salt, and cold water to create a batter.
- Heat the vegetable oil in a frying pan over medium-high heat.
- Dip each sardine in the batter and carefully place it in the hot oil.
- Fry for about 3-4 minutes on each side until golden brown and crispy.
- Remove the sardines with a slotted spoon and drain on paper towels.