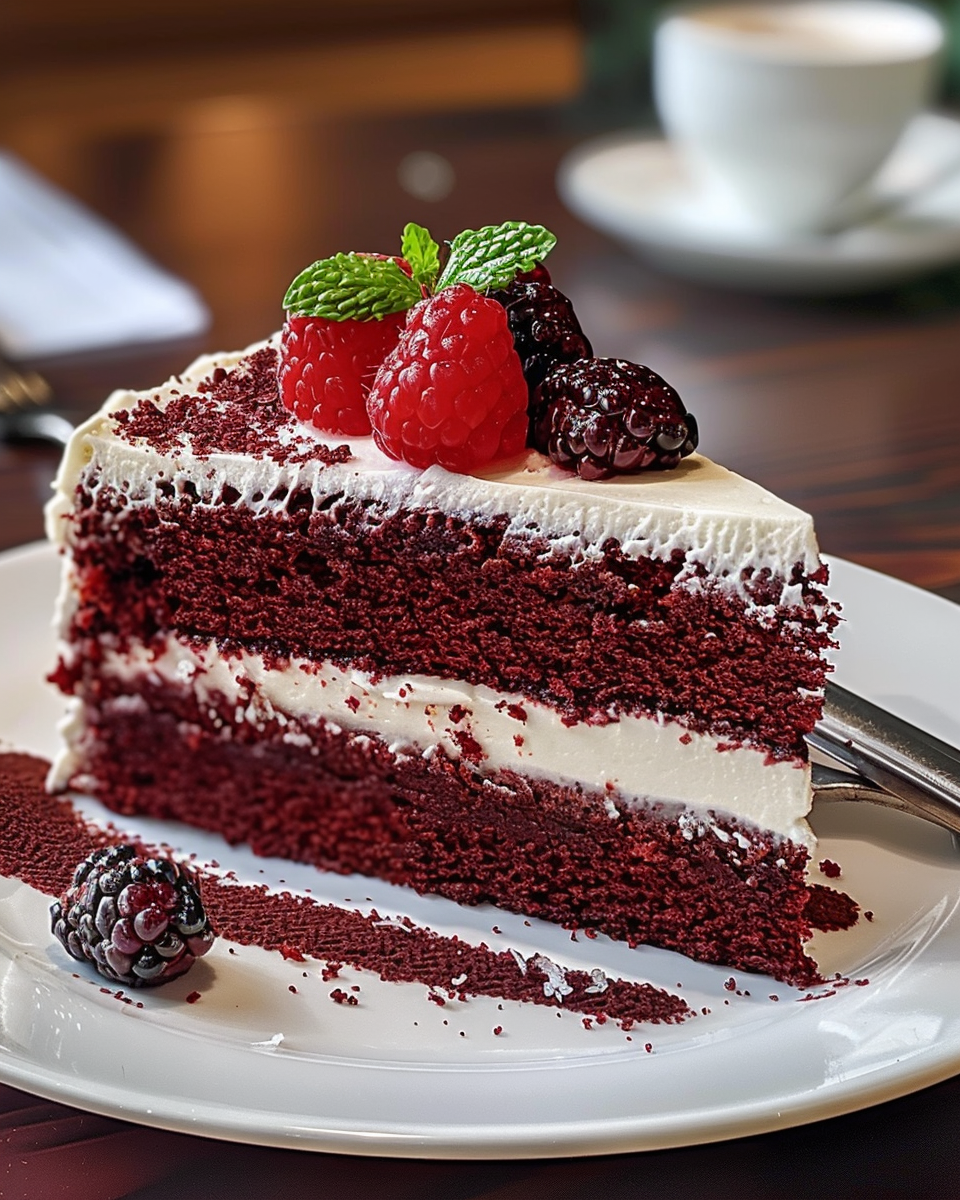
Red Velvet Cake, with its rich and velvety texture, has been a beloved dessert for generations. This iconic cake, with its vibrant red color and subtle cocoa flavor, has stood the test of time, making it a must-try for any occasion. Known for its smooth cream cheese frosting and eye-catching appearance, Red Velvet Cake is often reserved for special events, but it can easily be made at home. Whether it’s for a birthday, a celebration, or simply because you’re in the mood for a decadent treat, this cake is sure to impress.
Ingredients
To make this delicious Heritage Red Velvet Cake, you’ll need a few key ingredients. Here’s the full list:
- 2 ½ cups all-purpose flour
- 1 ½ cups granulated sugar
- 1 tsp baking soda
- 1 tsp salt
- 1 tbsp cocoa powder
- 1 ½ cups vegetable oil
- 2 large eggs
- 1 cup buttermilk
- 2 tbsp red food coloring
- 1 tsp white vinegar
- 1 tsp vanilla extract
- 1 cup unsalted butter (for frosting)
- 8 oz cream cheese (for frosting)
- 4 cups powdered sugar (for frosting)
- 1 tsp vanilla extract (for frosting)

Preparation
Now that you have all the ingredients ready, it’s time to begin preparing your Red Velvet Cake. Follow these steps carefully for the best results:
- Preheat your oven to 350°F (175°C). Grease and flour two 9-inch round cake pans.
- In a medium bowl, whisk together the flour, cocoa powder, baking soda, and salt.
- In a separate large bowl, beat together the sugar, vegetable oil, and eggs until smooth and creamy.
- Add the buttermilk, red food coloring, vanilla extract, and vinegar to the mixture. Mix until combined.
- Gradually add the dry ingredients to the wet ingredients, mixing until the batter is smooth and well incorporated.
- Pour the batter evenly into the prepared cake pans. Bake for 25-30 minutes or until a toothpick inserted into the center comes out clean.
- Let the cakes cool in the pans for 10 minutes before transferring them to a wire rack to cool completely.
- For the frosting, beat the softened butter and cream cheese until smooth. Gradually add the powdered sugar and vanilla extract, continuing to beat until the frosting is fluffy and smooth.
- Once the cakes are completely cooled, spread frosting on one cake layer, top with the second cake layer, and frost the top and sides of the entire cake.
Mistakes to Avoid
While making Red Velvet Cake is straightforward, there are a few common mistakes you should avoid to ensure a perfect result:
- Overmixing the batter: Overmixing can result in a dense and tough cake. Mix the batter just enough to combine the ingredients.
- Using the wrong food coloring: Always use liquid food coloring or gel food coloring. Avoid using natural food coloring, as it may not give the cake the vibrant red color you’re looking for.
- Underbaking or overbaking: Be sure to check the cake with a toothpick after 25 minutes of baking. If it comes out clean, your cake is ready. Don’t leave it in the oven for too long, as this will dry out the cake.
- Skipping the cooling step: Let the cakes cool completely before frosting them. If you frost a warm cake, the frosting will melt and slide off.
Ingredient Alternatives
If you’re looking to make substitutions in the recipe, here are a few options:
- Buttermilk: If you don’t have buttermilk on hand, you can make your own by mixing 1 cup of milk with 1 tablespoon of lemon juice or white vinegar. Let it sit for a few minutes before using.
- Red food coloring: You can substitute red food coloring with natural beet juice for a more natural approach, although the color might not be as vibrant.
- Butter: If you prefer to make the cake dairy-free, you can substitute butter with a non-dairy butter alternative or coconut oil.
- Frosting: For a lighter frosting, you can replace some of the cream cheese with whipped cream or use a different type of frosting like buttercream.

Tips and Tricks
To ensure the best Red Velvet Cake, here are a few helpful tips and tricks:
- Room temperature ingredients: Make sure your butter, eggs, and cream cheese are at room temperature before mixing. This helps everything blend smoothly.
- Measuring flour correctly: When measuring flour, spoon it into the measuring cup and level it off with a knife. This ensures that you don’t add too much flour, which could make the cake dry.
- Frosting consistency: If your frosting is too runny, add more powdered sugar to thicken it. If it’s too thick, add a splash of milk to achieve the perfect spreadable consistency.
- Decorating: For an elegant touch, decorate your Red Velvet Cake with cake crumbs, edible flowers, or chocolate shavings.
Suggestions
If you’re looking for some creative variations or ideas to enhance your Red Velvet Cake experience, here are a few suggestions:
- Add a layer of flavor: Consider adding a filling between the layers of your cake. A layer of strawberry jam, raspberry preserve, or even a chocolate ganache can add a unique twist to the classic Red Velvet Cake.
- Cupcake version: For individual servings, turn your Red Velvet Cake into cupcakes! Simply divide the batter evenly into cupcake liners and bake for 18-20 minutes. Frost them with the same cream cheese frosting for a bite-sized treat.
- Chill the cake: After frosting the cake, allow it to chill in the fridge for an hour or two before serving. This helps the frosting set and the flavors to meld together, resulting in a firmer slice and a more cohesive taste.
- Serve with fruit: Complement the richness of the cake with fresh berries or a fruit compote. The tartness of the fruit balances the sweetness of the cake beautifully.
- Make it a layered dessert: Instead of frosting the entire cake, try a more modern layered dessert by creating smaller portions, layering Red Velvet Cake with whipped cream, fruit, or chocolate sauce in individual cups.
FAQ
Here are answers to some common questions people have when making Red Velvet Cake:
- Can I make Red Velvet Cake without buttermilk? Yes! If you don’t have buttermilk, you can easily make a substitute by adding 1 tablespoon of vinegar or lemon juice to 1 cup of milk. Let it sit for 5-10 minutes before using.
- Why does my cake not have the bright red color? The color can be affected by the type of food coloring you use. Liquid food coloring is typically not as strong as gel food coloring. If you want a bright, vibrant red, consider using gel food coloring.
- Can I make the cake in advance? Yes, you can make the cake a day ahead. Just store the layers separately and frost them right before serving. This will help the cake stay moist and fresh.
- Is Red Velvet Cake gluten-free? Traditionally, Red Velvet Cake is made with all-purpose flour. However, if you need a gluten-free version, you can substitute the flour with a gluten-free flour blend.
- Can I freeze Red Velvet Cake? Absolutely! To freeze the cake, wrap the layers tightly in plastic wrap and aluminum foil before freezing. You can also freeze the frosted cake. Just be sure to let it thaw in the fridge before serving.

Conclusion
In conclusion, this Heritage Red Velvet Cake recipe is a timeless classic that delivers both in flavor and appearance. Whether you’re celebrating a special occasion or just indulging in a rich dessert, this cake is sure to impress everyone at the table. Its smooth cream cheese frosting, coupled with a soft and fluffy red velvet interior, creates a perfect balance of sweetness and richness. By following the tips and suggestions provided, you can make this cake your own and customize it to suit your preferences.
Print
Heritage Red Velvet Cake Recipe
Ingredients
- 2 ½ cups all-purpose flour
- 1 ½ cups granulated sugar
- 1 tsp baking soda
- 1 tsp salt
- 1 tbsp cocoa powder
- 1 ½ cups vegetable oil
- 2 large eggs
- 1 cup buttermilk
- 2 tbsp red food coloring
- 1 tsp white vinegar
- 1 tsp vanilla extract
- 1 cup unsalted butter (for frosting)
- 8 oz cream cheese (for frosting)
- 4 cups powdered sugar (for frosting)
- 1 tsp vanilla extract (for frosting)
Instructions
- Preheat your oven to 350°F (175°C). Grease and flour two 9-inch round cake pans.
- In a medium bowl, whisk together the flour, cocoa powder, baking soda, and salt.
- In a separate large bowl, beat together the sugar, vegetable oil, and eggs until smooth and creamy.
- Add the buttermilk, red food coloring, vanilla extract, and vinegar to the mixture. Mix until everything is combined.
- Gradually add the dry ingredients to the wet ingredients, mixing just until the batter is smooth and well-incorporated.
- Pour the batter evenly into the prepared cake pans. Bake for 25-30 minutes, or until a toothpick inserted into the center comes out clean.
- Let the cakes cool in the pans for 10 minutes before transferring them to a wire rack to cool completely.
- For the frosting: Beat the softened butter and cream cheese together until smooth. Gradually add the powdered sugar and vanilla extract, continuing to beat until the frosting is fluffy and smooth.
- Once the cakes are completely cooled, spread a layer of frosting on top of one cake layer. Place the second cake layer on top, and frost the top and sides of the entire cake.